
Join a Windows 10 PC or Device to a Domain`
To join a Domain, you must first ensure you have the following information and resources:
- A user account on the Domain, this information you can get from your Network Administrator.
- Name of Domain.
- A computer running Windows 10 Pro or Enterprise/Education editions
- Domain Controller must be running Windows Server 2003 (functional level or later).
- I discovered during testing that Windows 10 does not support Windows 2000 Server Domain Controllers.
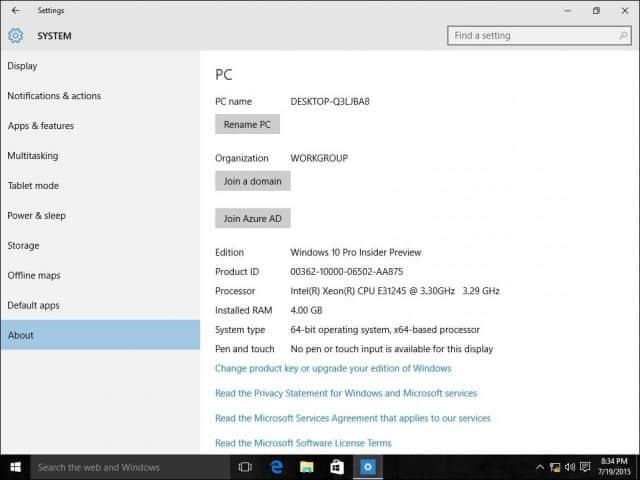
On the Windows 10 PC, go to Settings > System > About, then click Join a domain.
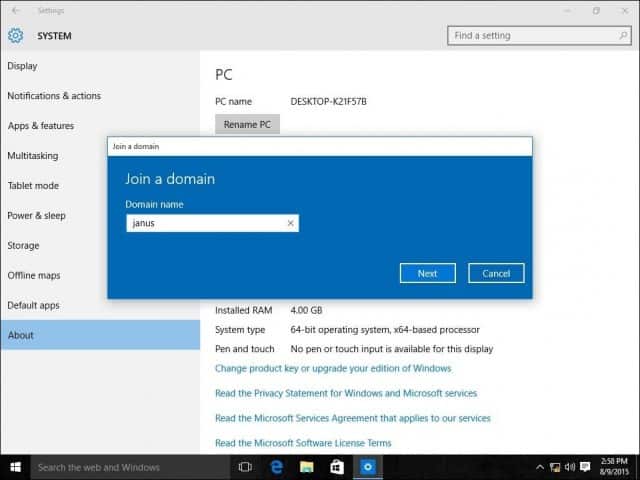
Enter the Domain name and click Next. You should have the correct domain info, but if not, contact your Network Administrator.
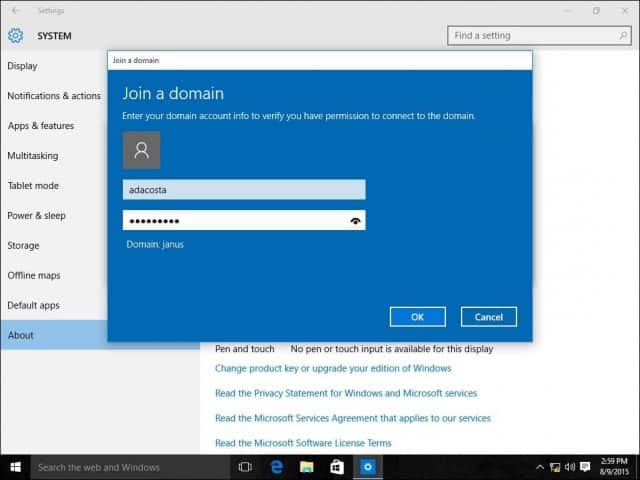
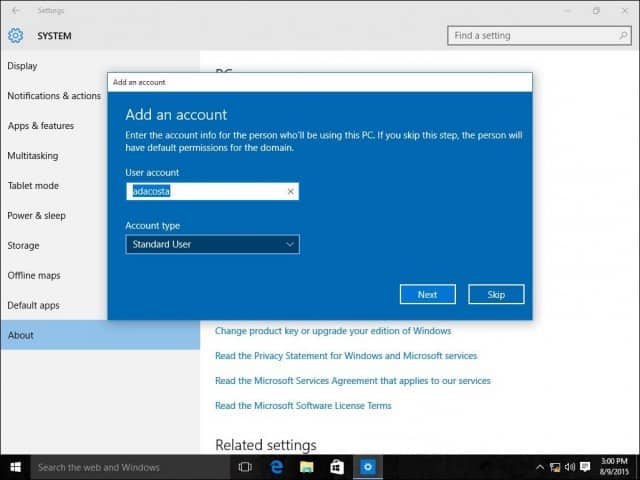
Enter account information that is used to authenticate on the Domain and then click OK.
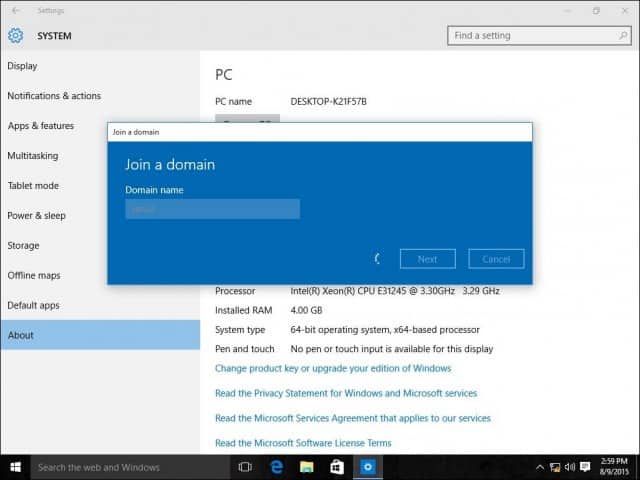
Wait while your computer is authenticated on the Domain.
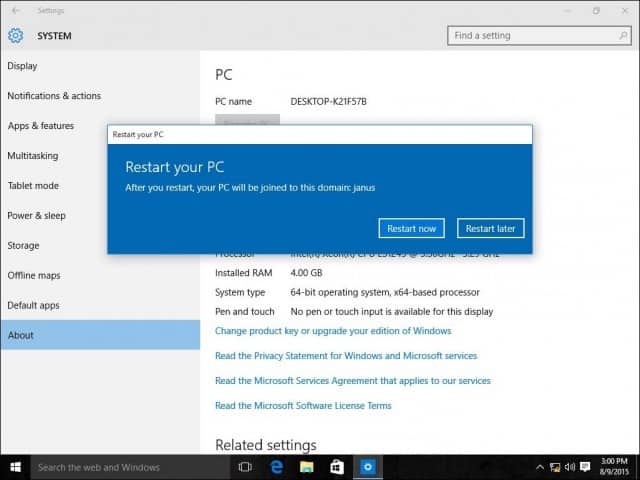
Click Next when you see this screen.
And then, you’ll need to restart to complete the process.
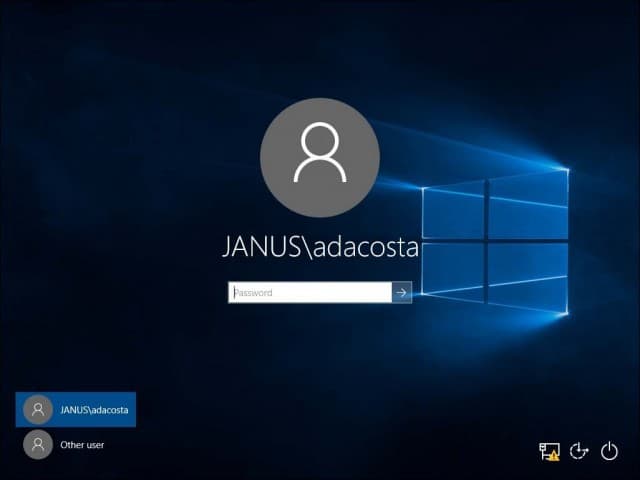
When the sign-in screen appears, you will notice the DOMAIN\User account is displayed. Enter your password, and you will now be logged onto your Domain.
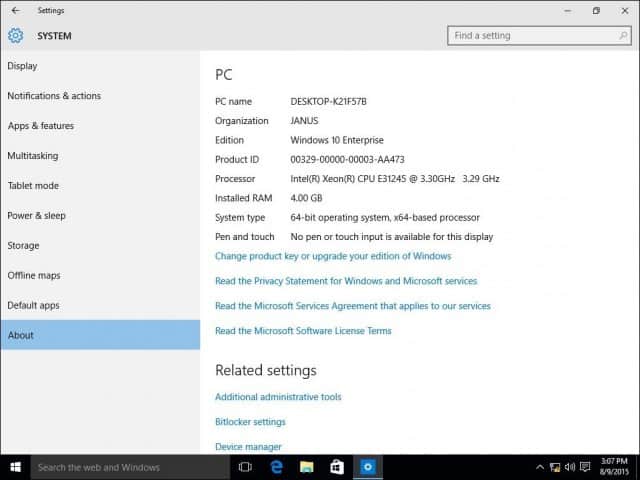
You will notice that once you are connected to the Domain, your About setting no longer lists options presented before. This is because the server centrally manages your computer.
Leaving the Domain or log into your local account
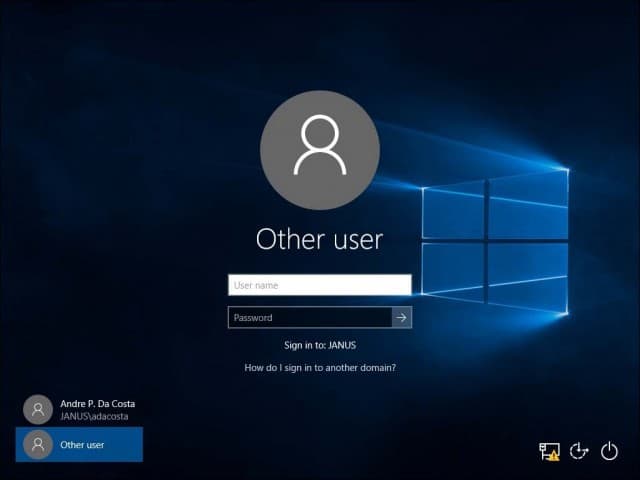
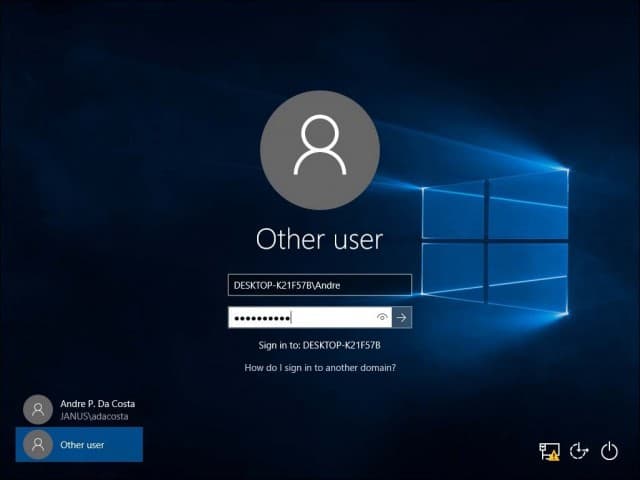
If a need arises where you need to leave the domain or log into your local account, you can easily do so. Log into your local account while your computer is joined to a Domain. Sign out of your machine at the sign-in screen, select “Other” user.
Enter the machine name followed by a backslash and then your local user account, as shown below.
Leave a Domain
To leave the Domain, sign in to your Local Account, click Start > Settings > System > About and then select Disconnect from the organization.

Please note, when you join a domain, you might be required to change your password on the first login.